Last Updated: 2024-10-16
Background
Datavolo developers need a mechanism to commit their NiFi dataflows to a source code repository.
Scope of the tutorial
In this tutorial, you will integrate a NiFi cluster, such as a Datavolo Runtime, with a GitHub repository and then create, update, and refresh versioned dataflows from the UI.
Learning objectives
Once you've completed this tutorial, you will be able to:
- Configure a Registry Client to work with GitHub.
- Commit an non-versioned flow.
- Create a Process Group from a versioned flow.
- Commit modifications to a versioned flow.
- Update a versioned Process Group to include modifications.
Prerequisites
- Access to a NiFi cluster, such as a Datavolo Runtime. See Datavolo Cloud: Getting started.
- Basic familiarization of building dataflows with Datavolo. See Build a simple NiFi flow.
- Basic knowledge of git and create/commit repo access on https://github.com/.
- Optionally, an understanding of dataflow import/export concepts. See NiFi dataflow import/export.
Tutorial video
As an option, you can watch a video version of this tutorial.
Section video
As an option, you can watch a video of this step.
Create GitHub repository
Log into https://github.com and create a new repository.
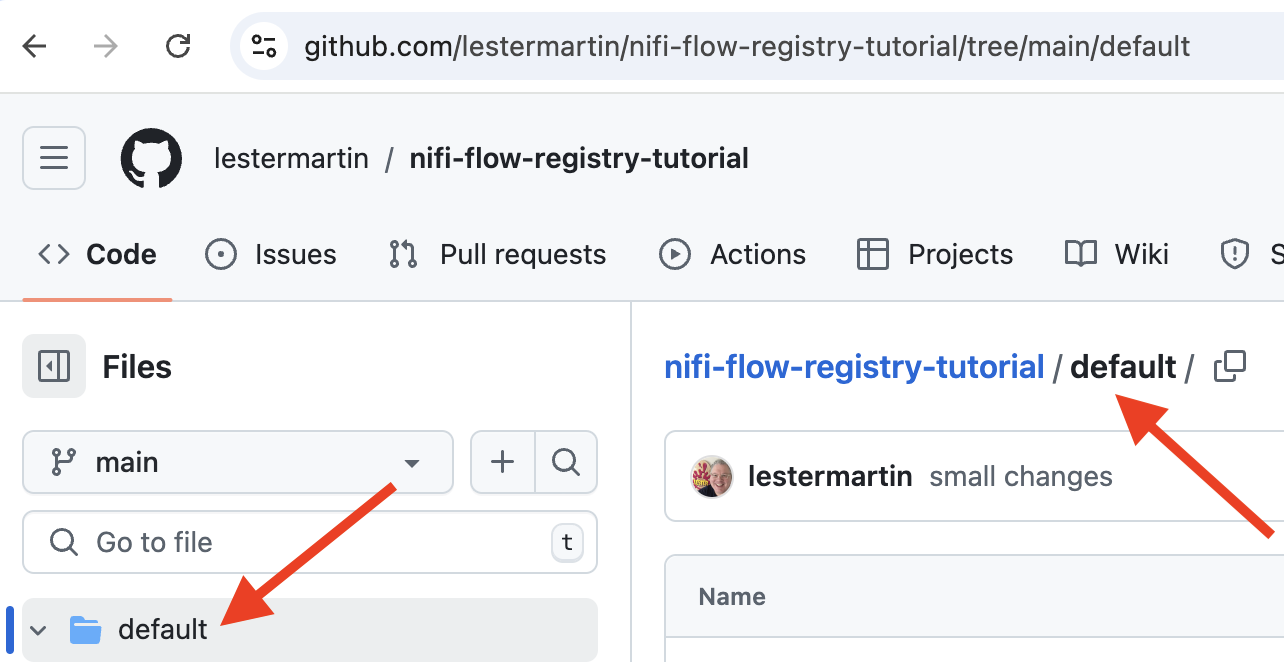
For this tutorial, the examples will be leveraging the repository shown below. Your account owner will be different and you can use another repository name if you prefer, but the instructions will assume it is identified as nifi-flow-registry-tutorial.
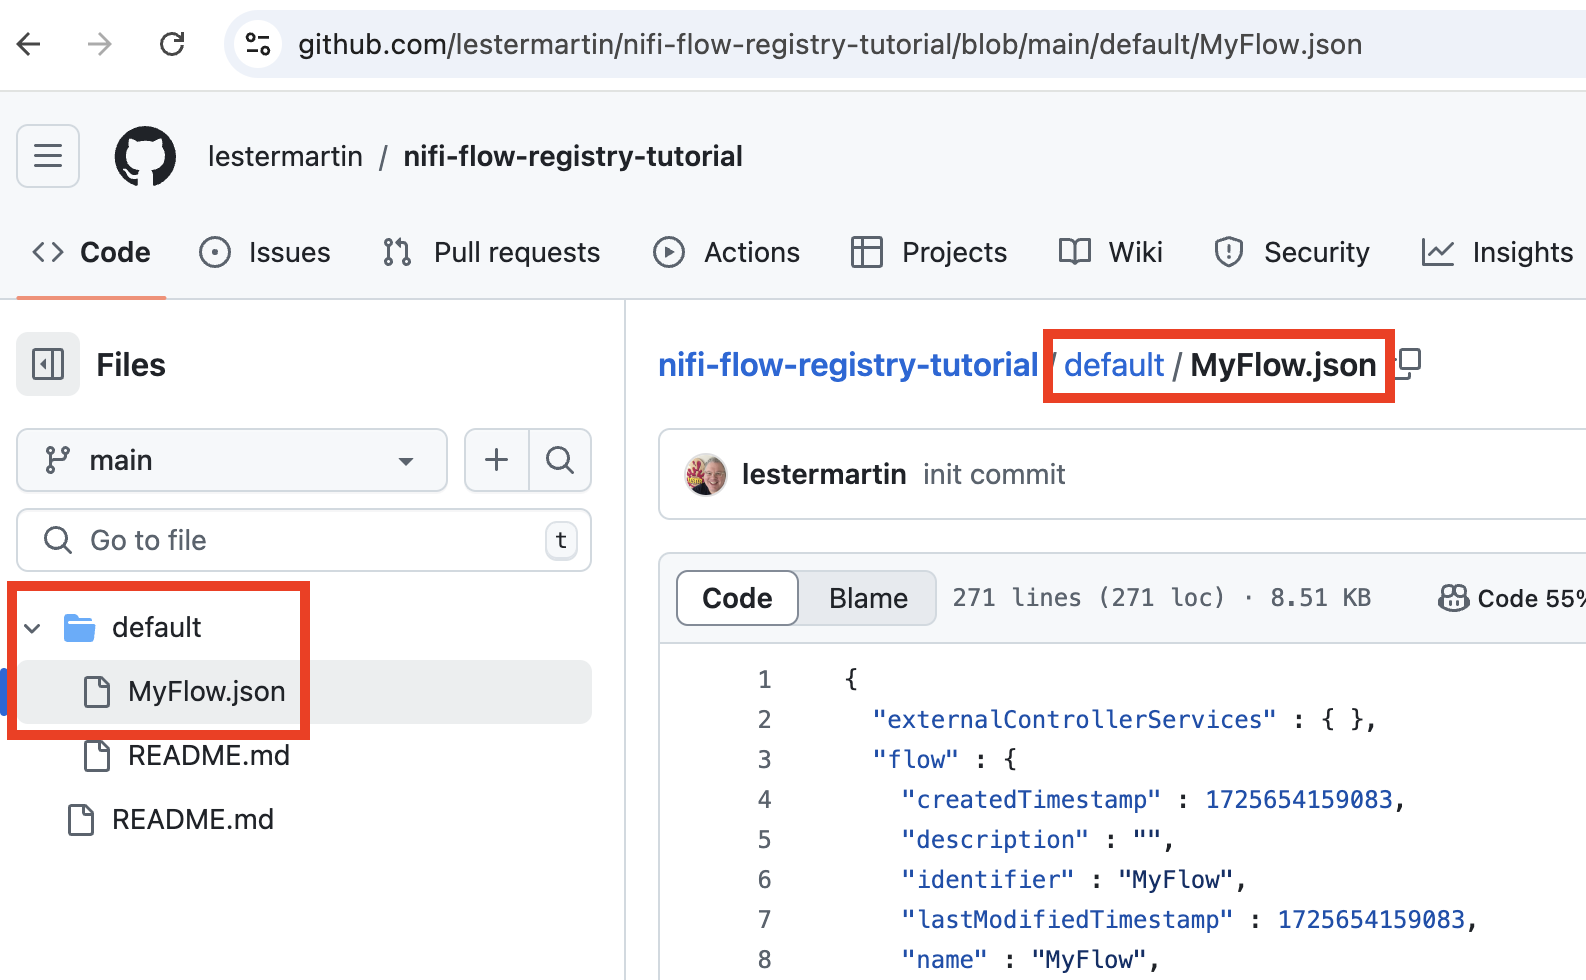
For this new repo, you need to create a folder named default within it as you see below.
Initialize the canvas
Access a Runtime
Log into Datavolo Cloud and access (create if necessary) a Runtime. Alternatively, leverage a Datavolo Server Runtime that you have access to.
Simulate environments
To test everything out in this tutorial, ideally you would work on two separate Runtimes. For simplicity, you can create two Process Groups and name them Simulated dev and Simulated prod as you see below.

Create a Registry Client
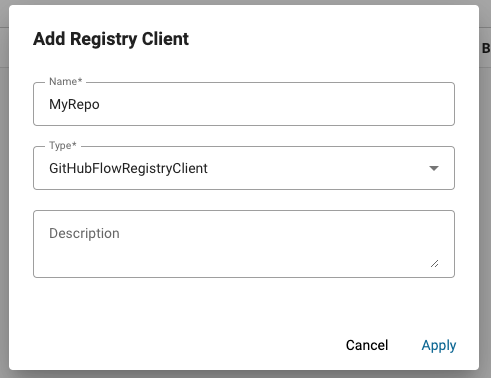
Choose Controller Settings from the menu drawer (aka the hamburger menu) in the upper right of the screen and then select the Registry Clients tab. Click the + icon on the right.

Set Name to MyRepo and ensure GitHubFlowRegistryClient is selected for Type. Click Apply.
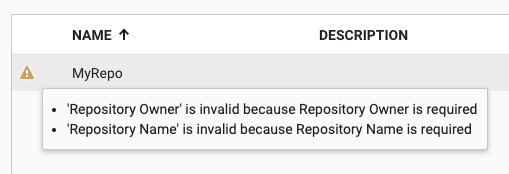
Hovering over the warning icon by the new entry in the list indicates existing configuration issues.
Click the vertical ellipsis on the far right of the list entry and select Edit. Navigate to the Properties tab. Enter your Repository Owner and Repository Name values. The values shown below are the figurative ones presented at the top of this step – yours will be different.
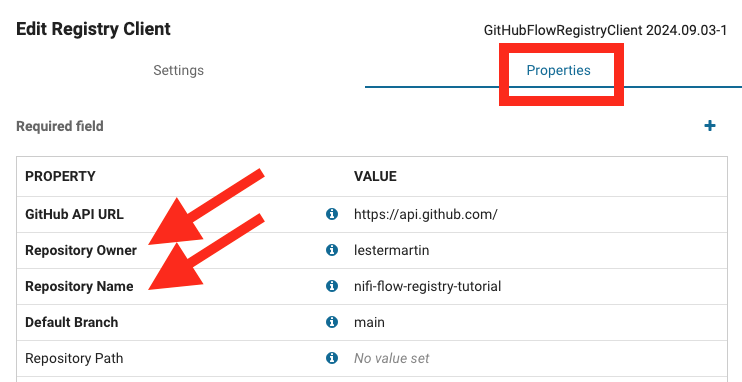
Before you Apply the changes, select Personal Access Token for Authentication Type and enter your own Personal Access Token as well.

Your GitHub repo is ready to be used.
In this step, you will create a new dataflow and then commit it to your repo.
Section video
As an option, you can watch a video of this step.
Create the flow
Enter the Process Group (PG) named Simulated dev. Create a new PG named MyFlow and enter it so that your breadcrumbs look like the following.

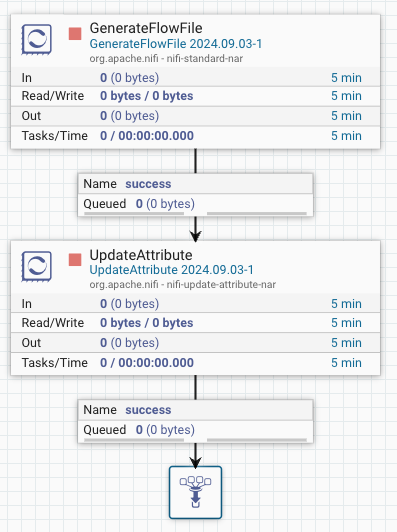
Create a very simple flow consisting of GenerateFlowFile & UpdateAttribute processors and a funnel. Make the appropriate connections so that your flow resembles the one below. Do not edit any of the properties for either processor.
Start version control
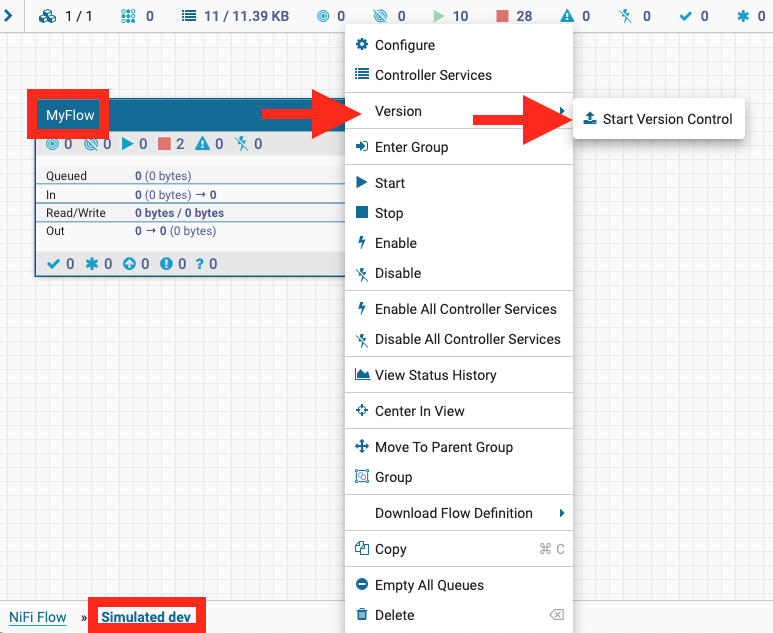
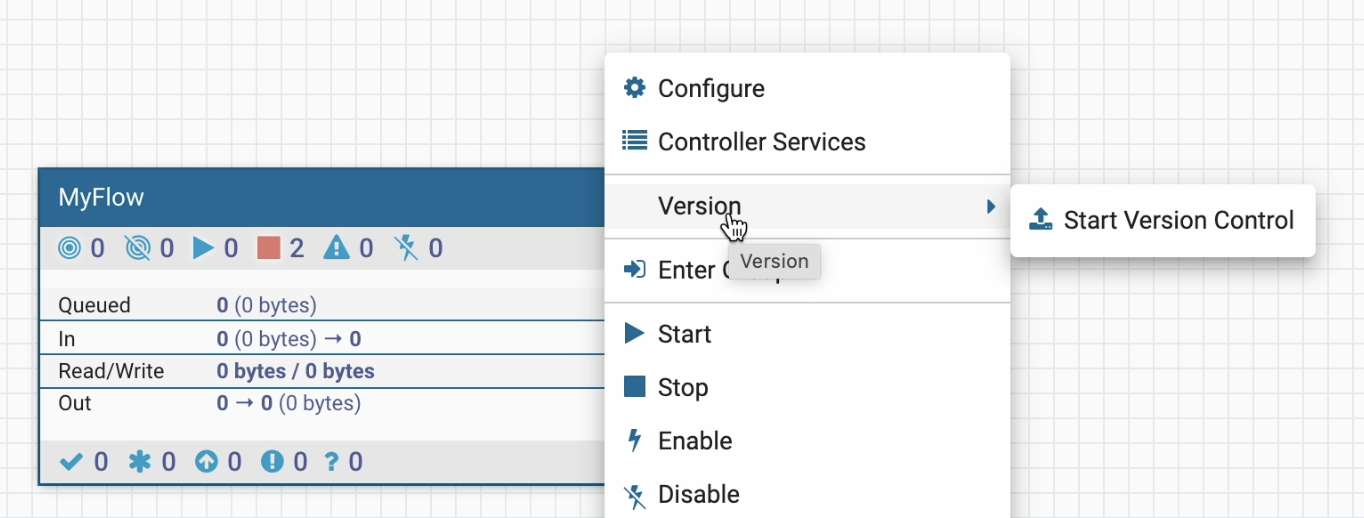
Leave Group so that the breadcrumbs show you are in Simulated dev and can see MyFlow. Right click on the PG and select Version and then Start Version Control from the contextual menu that surfaces.
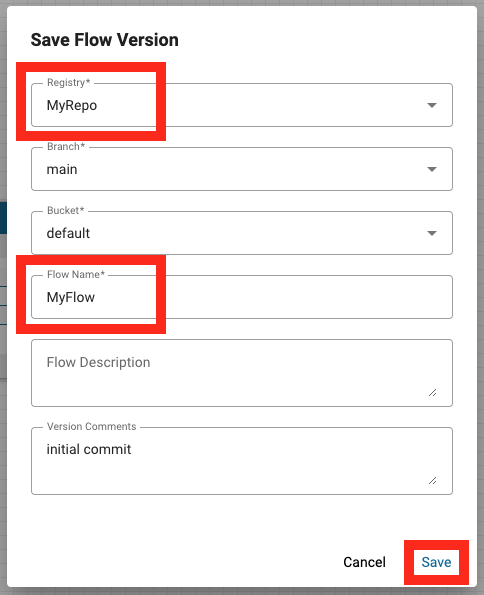
Ensure MyRepo is selected for Registry (this is the name of the Registry Client you set up earlier) and enter MyFlow for Flow Name. Optionally, add Version Comments and then click Save.
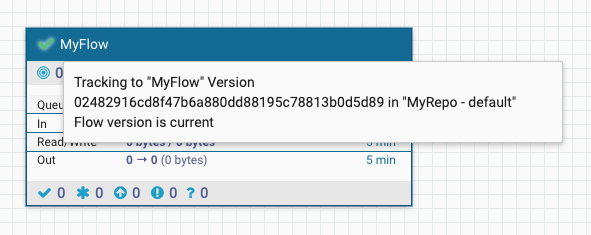
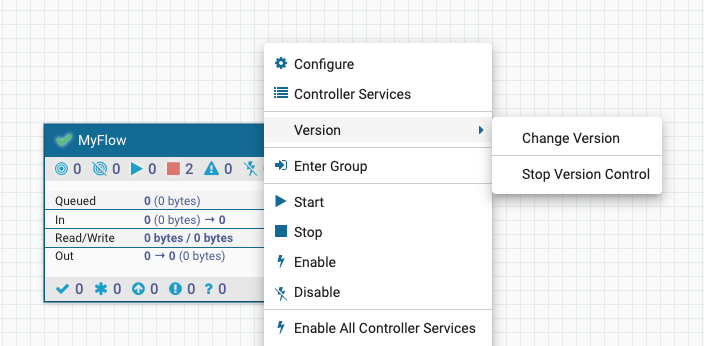
A green checkbox is now present in the upper left corner of the PG which identifies "My Flow" is being tracked in "MyRepo - default" and that the Flow version is current when hovering the mouse over it.
Additionally, the options for the Version contextual menu item are different now.
Verify the commit
You can verify the new file is present by returning to GitHub.
In this step you will perform the actions to deploy the newly created dataflow from GitHub.
Section video
As an option, you can watch a video of this step.
Navigate back up to the top-level NiFi Flow and then into Simulated prod. Alternatively, you could use a second Runtime, but be sure to create the needed Registry Client again if you do so.
Drag the Import From Registry component type from the toolbar to the canvas.
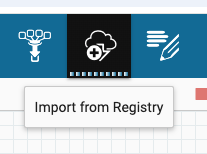
Drop it onto an empty area of the canvas within Simulated prod. Verify the Registry and Flow values are correct and click Import.
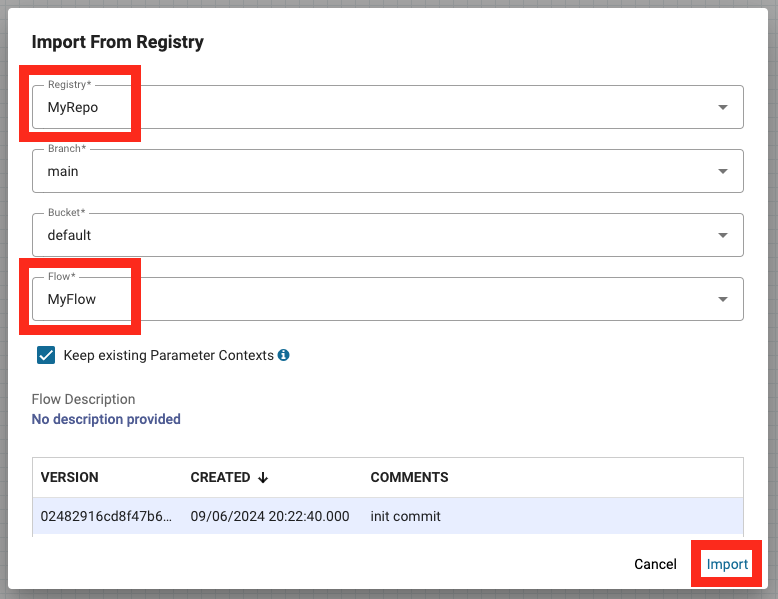
You will see the same green checkbox from before and you can drill into the PG to validate the flow is as expected.
In this step, you will make changes to the existing dataflow and commit those changes to GitHub.
Section video
As an option, you can watch a video of this step.
Make changes
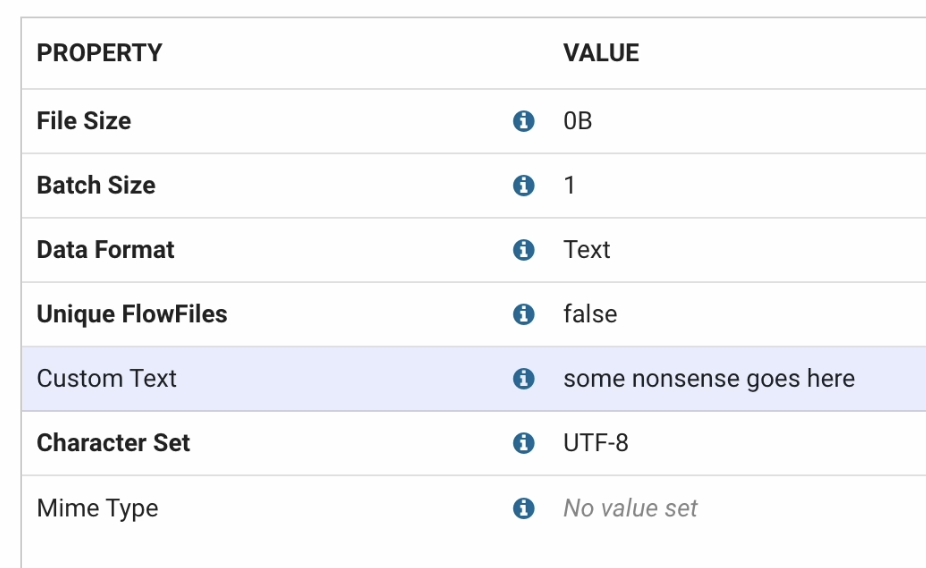
Back in Simulated dev, change the blank value of the Custom Text property from the GenerateFlowFile processor to be some nonsense goes here.
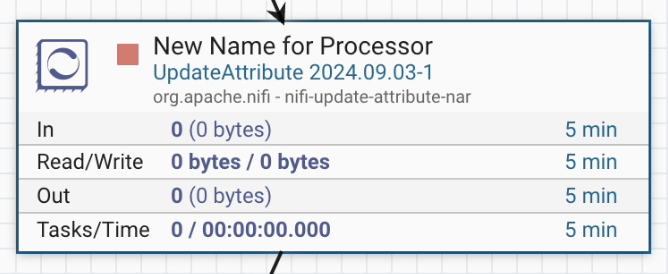
Rename the UpdateAttribute processor to New Name for Processor.
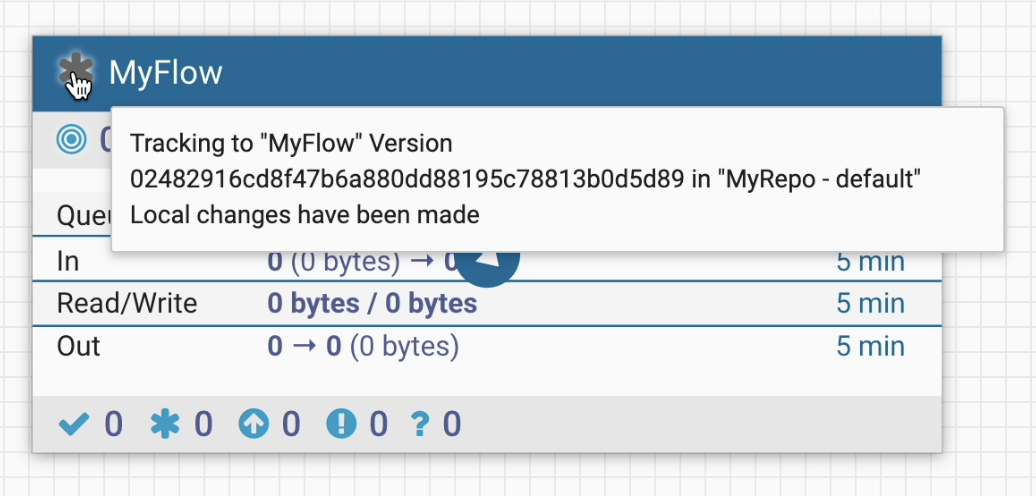
Leave Group and then notice a black asterisk is now present in the upper left corner of the PG which identifies "My Flow" is being tracked in "MyRepo - default" and that Local changes have been made when hovering the mouse over it.
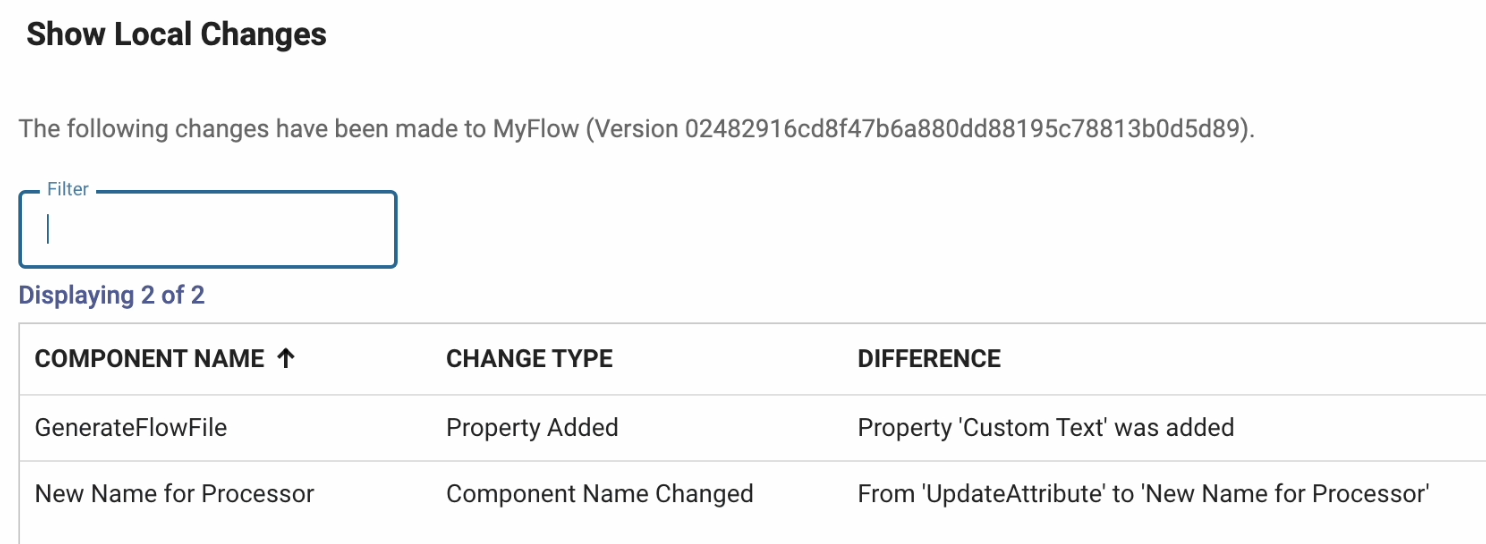
Right click on the PG and select Version > Show Local Changes.
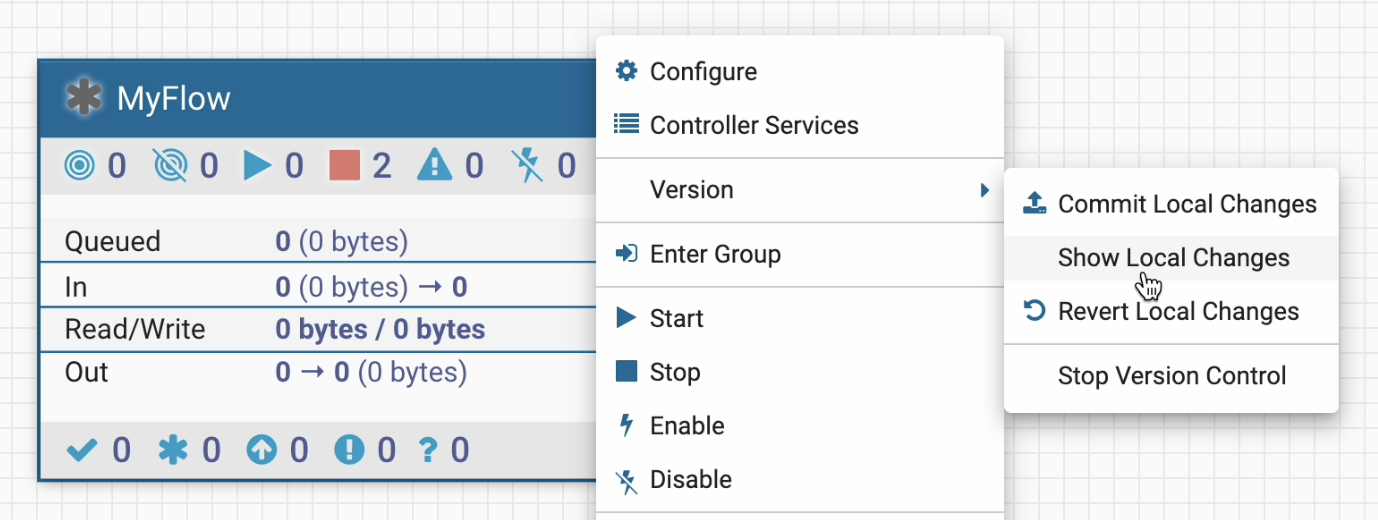
Verify the two changes previously made are listed.
Commit version
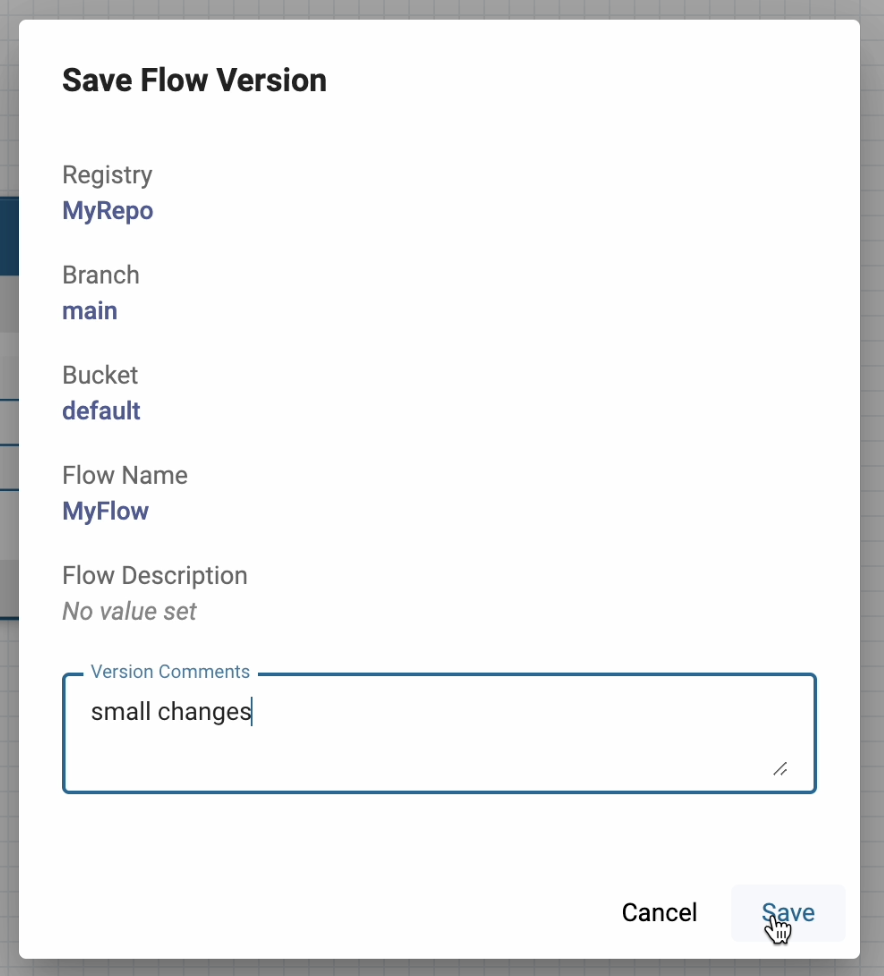
Right click on the PG and select Version > Commit Local Changes.

Add any appropriate Version Comments and Save to make the commit to GitHub.
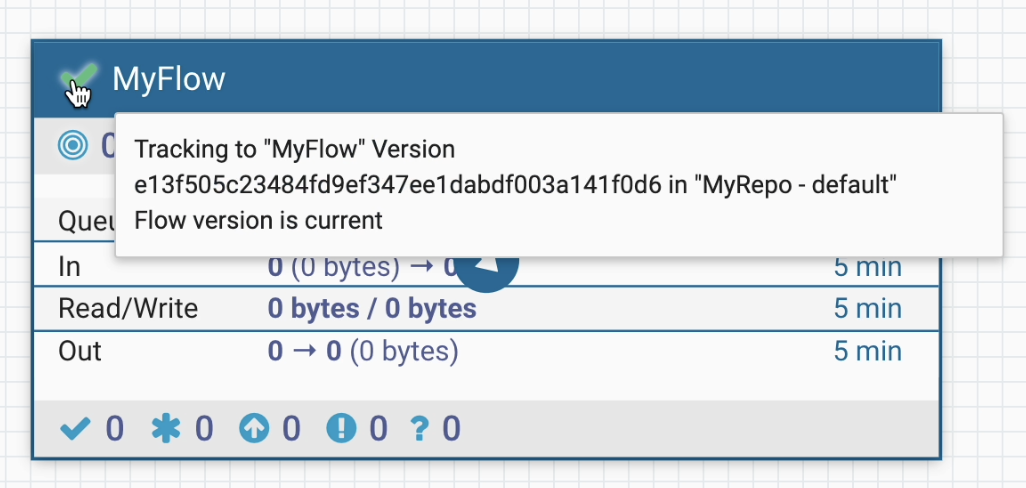
Notice that the PG is now showing the desired green check and is reporting the Flow version is current.
Verify the commit
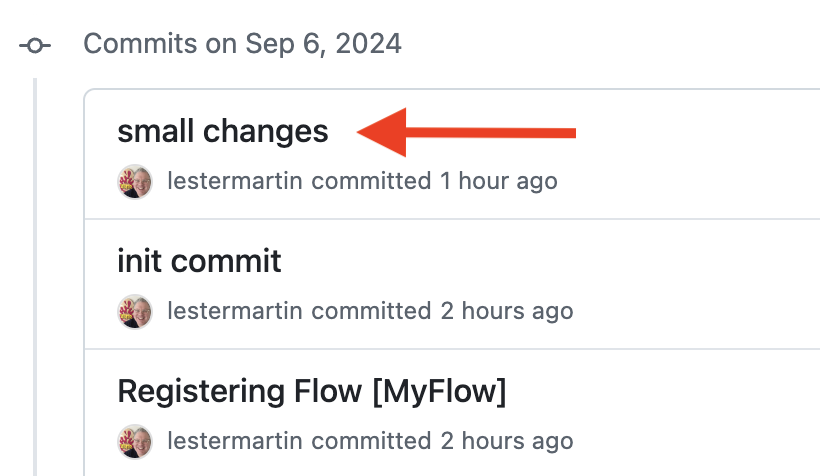
Back on GitHub, validate that the commit is present.
Verify the appropriate changes are present in the MyFlow.json file that was modified.

In this step you will perform the actions to update the PG with the changes from the last step.
Section video
As an option, you can watch a video of this step.
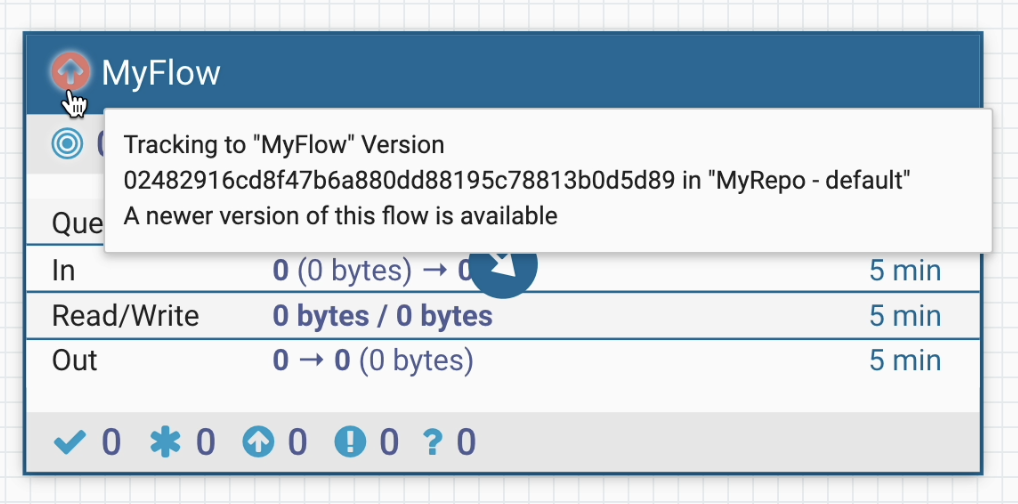
Navigate back up to the top-level NiFi Flow and then into Simulated prod. Notice the red icon in the upper left corner of MyFlow and the message that surfaces when you hover over it. The message says A newer version of this flow is available.
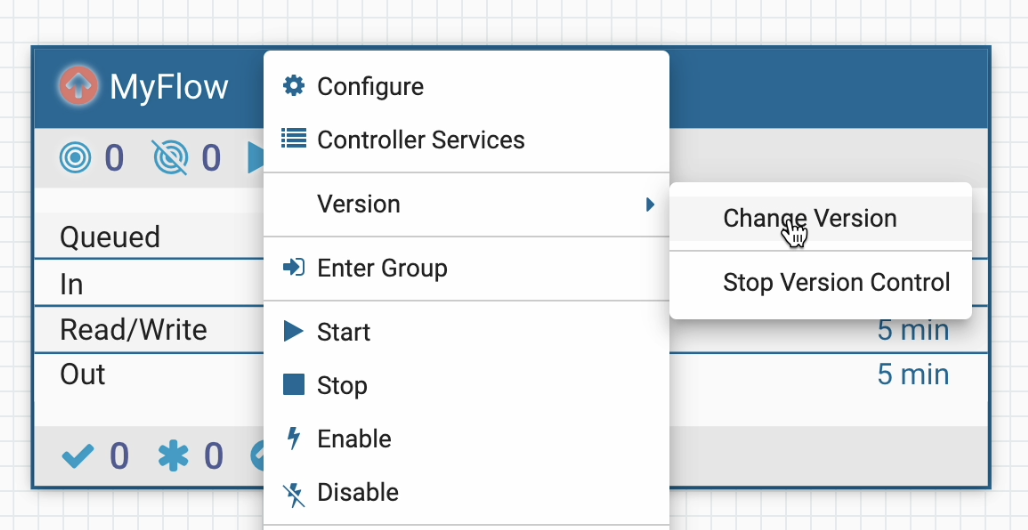
From the context menu that surfaces when you right click on the PG, select Version > Change Version.
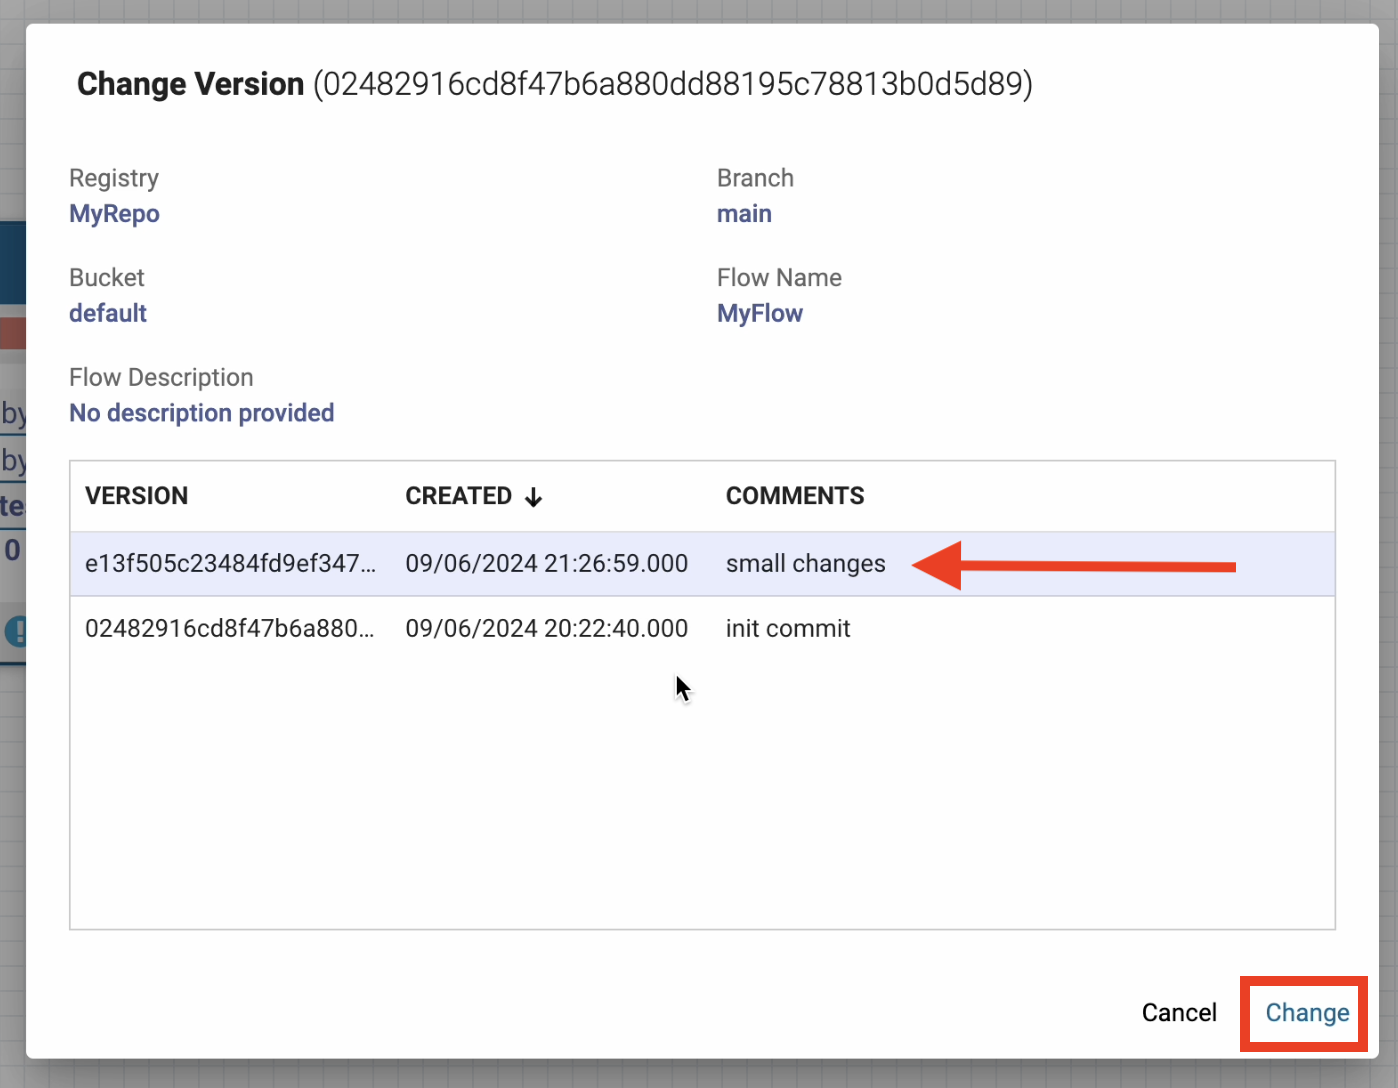
On the window that surfaces, leave the VERSION identified with COMMENTS of small changes selected and click on Change to pull in the most recent version of the flow.
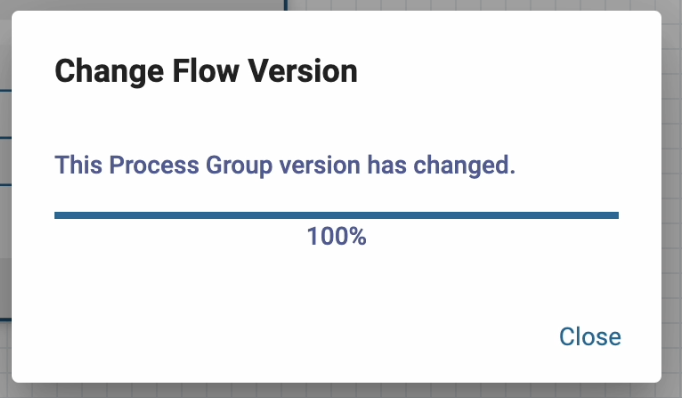
A verification message will surface that identifies the Change Flow Version action has occurred.
You will see the same green checkbox from before and you can drill into the PG to validate the flow changes from earlier are now reflected inside Simulated prod.
Section video
As an option, you can watch a video of this step.
These flows under version control in GitHub can still be useful if you do not have a Runtime configured with an appropriate Registry Client. If you can access the repo from your web browser, you can navigate to the dataflow you are interested in and then download the JSON file itself.

From there, you can import the JSON as a new Process Group.
Once you have done that, you could even decide to Start Version Control on it with any configured Registry Client.
Congratulations, you've completed the Versioning NiFi flows with GitHub tutorial!
What you learned
- How to configure a Registry Client to work with GitHub.
- How to commit a non-versioned flow.
- How to create a Process Group from a versioned flow.
- How to commit modifications to a versioned flow.
- How to pull in modifications to a versioned flow.
What's next?
Check out some of these codelabs...